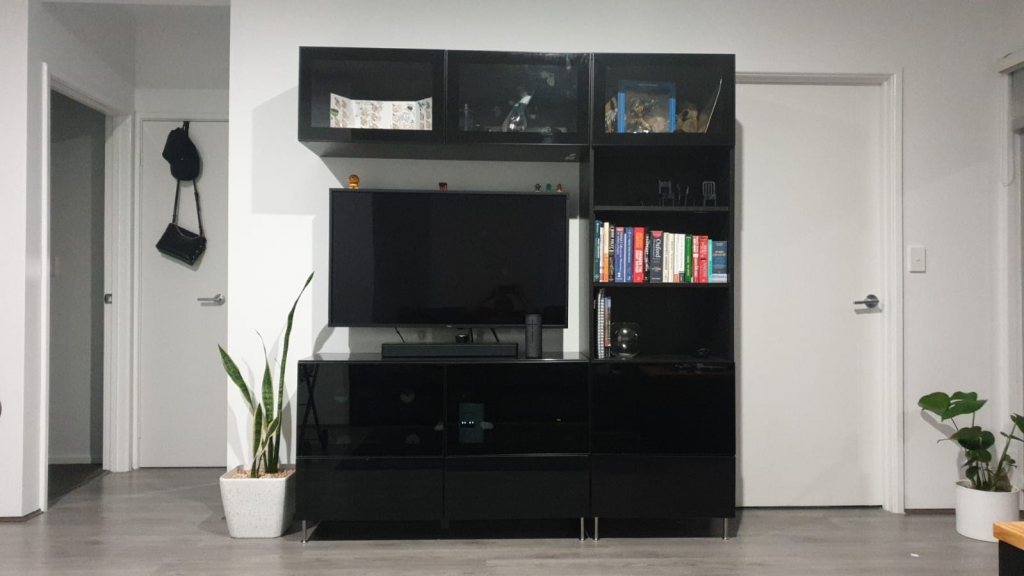
So, IKEA’s Besta is a wonderful system designed for use in home entertainment applications and well… For just about anything you can think of really, that needs an attractive looking storage solution as well as storage that is practical.
I have also always wanted to put a HTPC inside said setup, but like with all entertainment units, it’s quite tricky to justify keeping something like a Games console or PC inside such a unit, due to the fact that it’ll become either difficult to clean or horrendously overheated.
I have recently gotten into designing and building custom water cooling loops. It’s really, really good fun and it is definitely something that I can recommend pretty much anyone who’s into computers to try at least once in their lives. One great thing about custom loop cooling is the simple fact that you can literally move heat around from one location to another to allow your computer to ditch the heat from hot components such as your CPU and GPU, wherever is practical. Now in most cases, the cooling system quite literally just dumps heat right the hell back into the case, creating a really hot, turgid environment for your components, but also it’s an absolute pain in the butt to maintain!
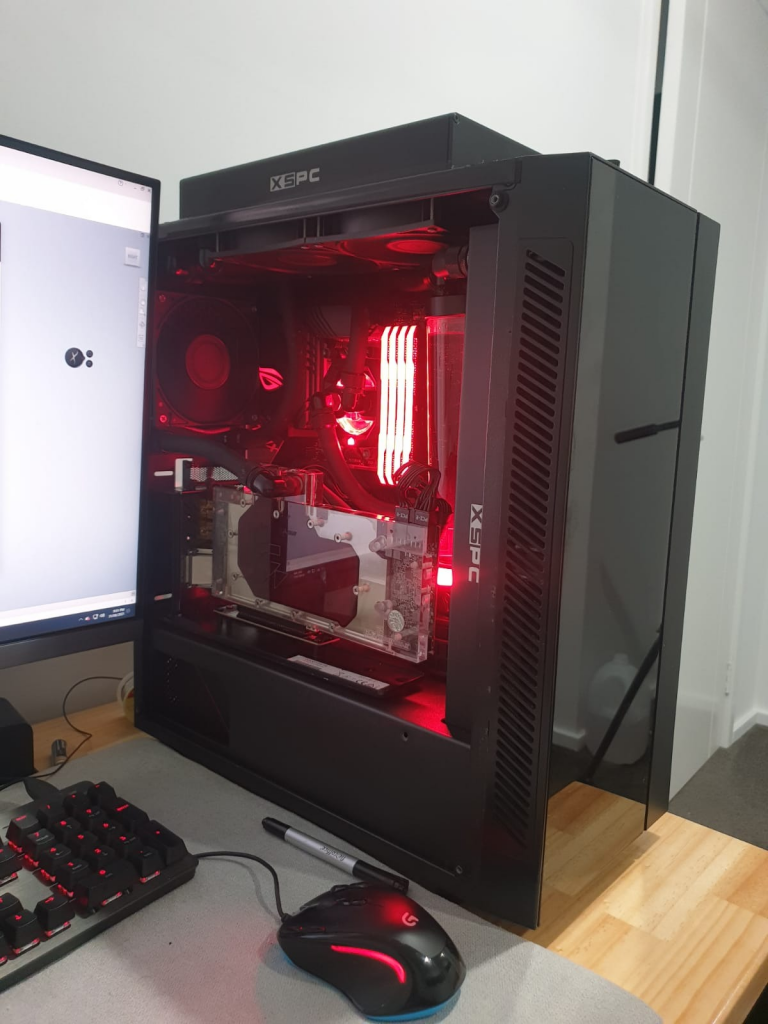
This is my current PC. It’s packing an AMD Ryzen 9 5900X, a GTX1080Ti Gaming OC GPU and three big ‘ol rads from XSPC. This case however, was the very first case I bought for the purposes of going liquid cooling, a Deepcool Mattrexx 55.
Now, this isn’t a half bad case for $100, but the problem is that although it says it can handle a 240mm radiator in the top and a 120mm in the rear, the mileage that varies in this particular case is about as wide as the Simpson Desert. Seriously, this thing has been hacked to shit!
So it’s time to use my CNC engineering powers for good. Combining my relentless love for IKEA furniture and my even greater love of computers into one exciting and daring project.
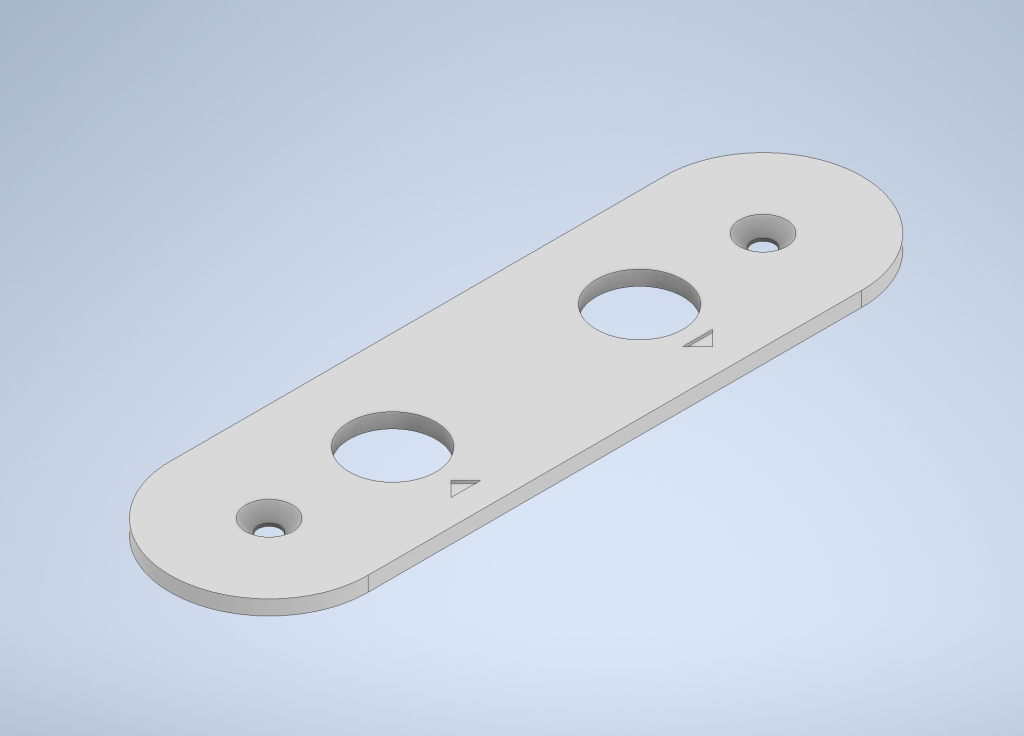
And it all starts with this.
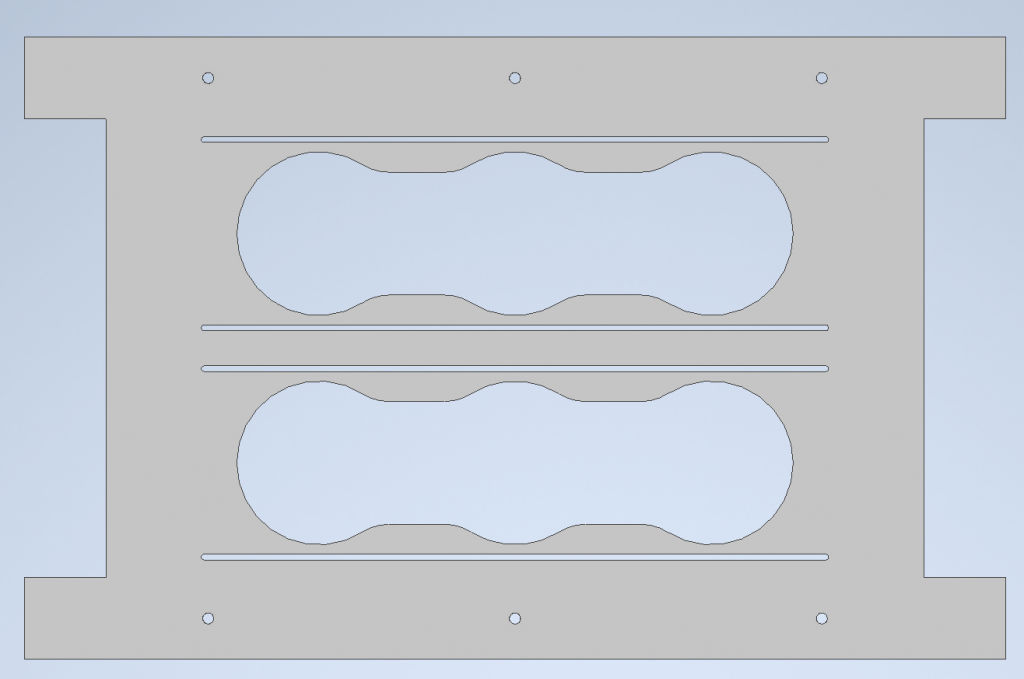
Now yeah, that might not look like much, but this is going to form one of the most crucial parts of this project. This piece is the backing plate that will secure our two 360mm radiators to… what exactly?
A custom made IKEA door of course!
IKEA BESTA doors are one of two sizes. 600×380, or 600x640mm, and since there’s a need for 50mm clearance from the outside edges to make up for the Euro hinges that these doors use, I needed to factor that into the design. This piece will be made from 3mm thick material of some sort, be it Acrylic, Aluminium (Preferably) or steel.
As for the front of the doors?
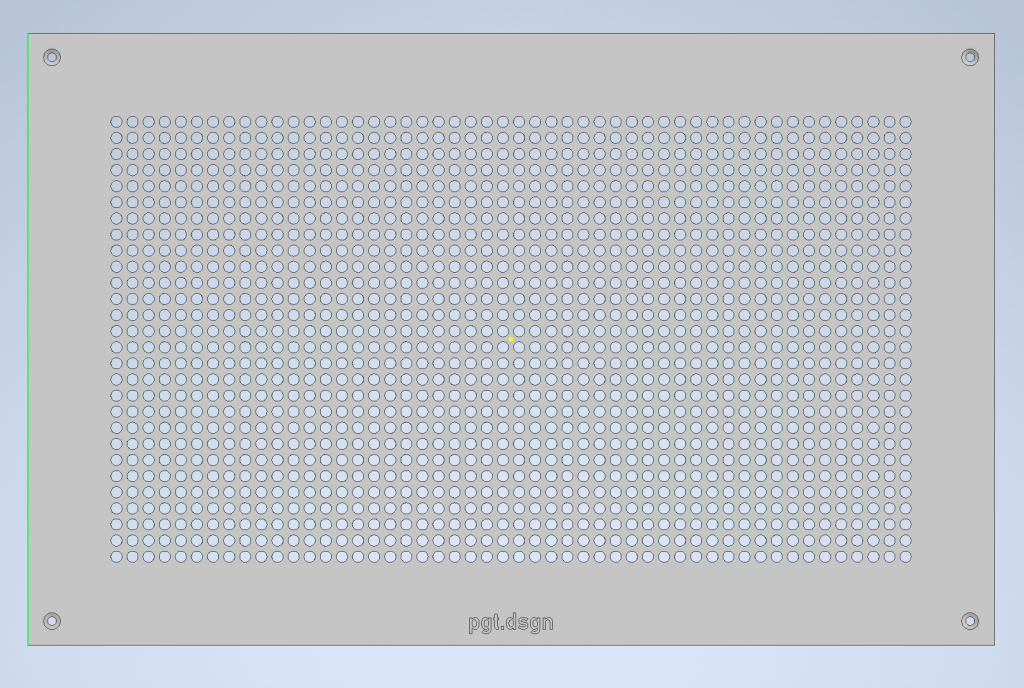
I’m going with the same material, save for around 1,700 7mm holes drilled into it of course! This material should be more than capable of providing the necessary exhaust (yes, you heard me) for the six EKWB Furious Vardar fans we intend on shoving behind these panels.
So then, the next thing would be to suss out how I intend on actually making this work. Well, actually it isn’t that tricky. We’ll be going with using the fans to pull air from underneath the cabinet and exhaust it through the front of the case. As for the fluid though, We need to well, pass lines through a shelf. That means…
…We need a manifold to pass G1/4 fittings from the upper area, where we’re going to be housing our computer, pump and reservoir, and the lower area, which will house our PSU, radiators and fans.
The pump and reservoir we are choosing is none other than EKWB’s monster 300mm Quantum Kinetic D5 pump res combo. Ooh, shiny! To do that though we’re going to need a way to secure said pump and res to a flat surface as opposed to the wall of a PC case.
That’s where this comes in. This is a really low profile mount for our really low profile mount on our EKWB pump/res. This quite literally bolts to the floor of a shelf. This will be 3D printed from ABS as it doesn’t need to support much weight. The four bolts on the base will be taking up the bulk of the slack.
Luckily, IKEA’s shelves are a fixed size, 580×380. What isn’t a fixed size is our motherboard. Sadly, there’s no real straightforward way to put motherboard standoffs onto a wooden surface… Oh wait, there is!
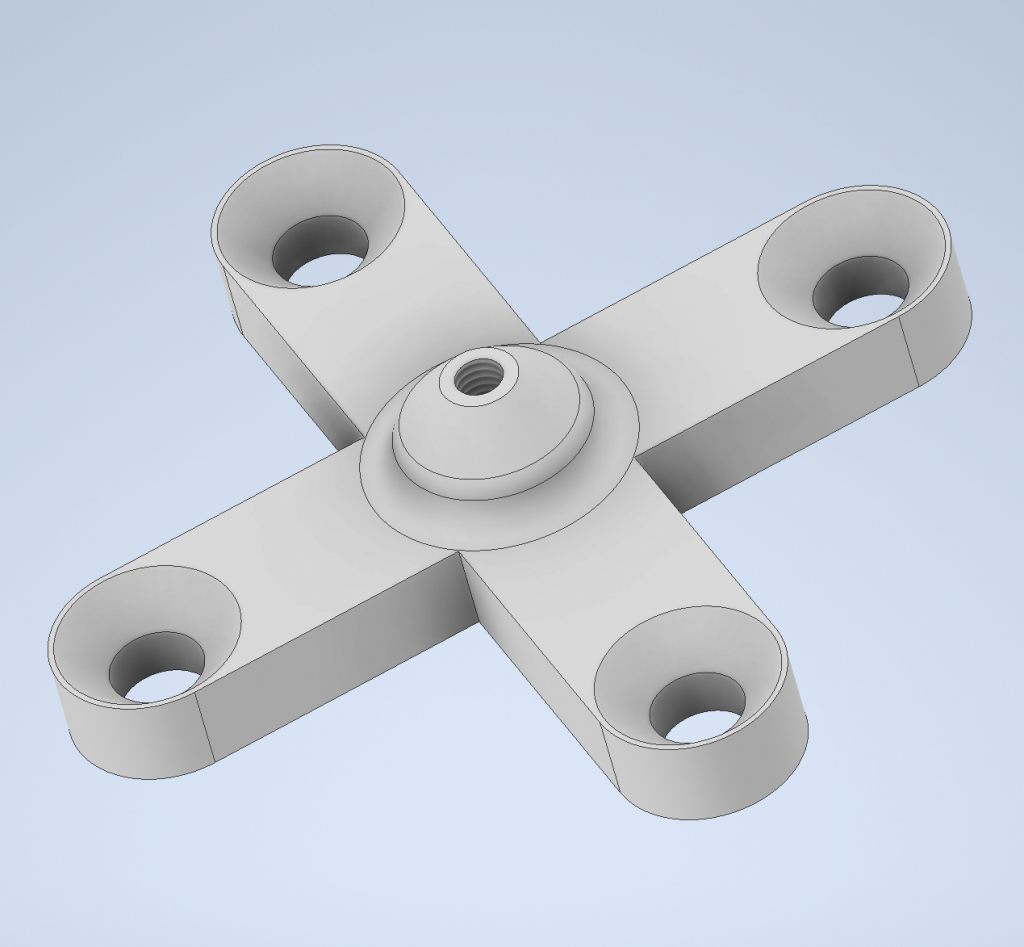
Okay, I’m a product designer, not a comedian… These parts are no joke though. You can’t exactly screw standoffs onto wood, however what you can do, is screw standoffs into… Standoffs that can screw into wood. Yo! These are M5 countersunk on the corners, and M3 in the centre. The hole in the centre is threaded all the way through for some real deep thread action.
So the intent with these standoffs is to basically mount these in such a way allows the motherboard to lie flat. WeirdChamp moment sure, but the benefit to allowing the motherboard to lie flat is to make it easier to mount the GPU, make it harder for air bubbles to form in the notoriously difficult to bleed Corsair XC7 that I’m using as a CPU block. The intent is to basically make the reservoir’s cap the single highest point in the loop. This means Air’s only got one way to go… Up! Heat will also travel into the plates of the GPU and CPU a lot better, and if we ever want to expand it, there’s no need to mess around with Risers to get a Vertical GPU setup.
These standoffs will also be 3D printed.
As for the rest? Well, there’s a Power Supply mount to make, as well as coming up with a cost-efficient way to get cables in and out of the system.
For now, I will keep you posted as stuff comes in, and as stuff gets made. I’ve yet to even buy the frames!
Beano out.