So, I sent the door panel off to my prototyping agent in China late of a Friday evening, and well… Let’s just say the 669 work schedule really doesn’t mess around when it comes to getting things done. Even though I recieved a quote incredibly quickly, unfortunately I learnt a thing or two about prototyping. If you want to do something big and stronk, you better pony the hell up.
Well, it’s time to go back to the drawing board… or back to Inventor anyway
So, with the idea of producing prototypes for this system out of Aluminium basically defenestrated like a disused 2008 iMac, I am opting to use the services of a local laser cutting company to cut the prototypes. This quite literally involves me totally reinventing the shelf in Inventor. It also means I can produce the parts right here in sunny, lockdown-free (as of the time of writing) Perth!
You’re probably thinking… “Hang on a minute, how the bloody hell is that supposed to stay in the damn shelving unit when there’s no support for the standoffs in the shelf?“
Well let me just…
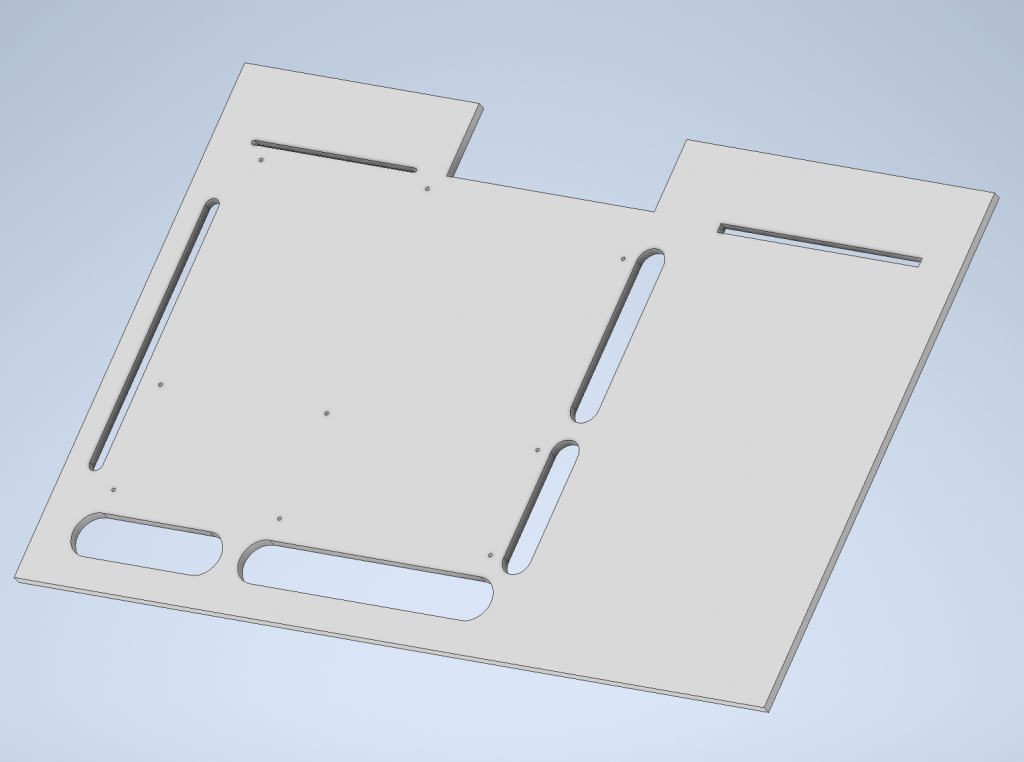
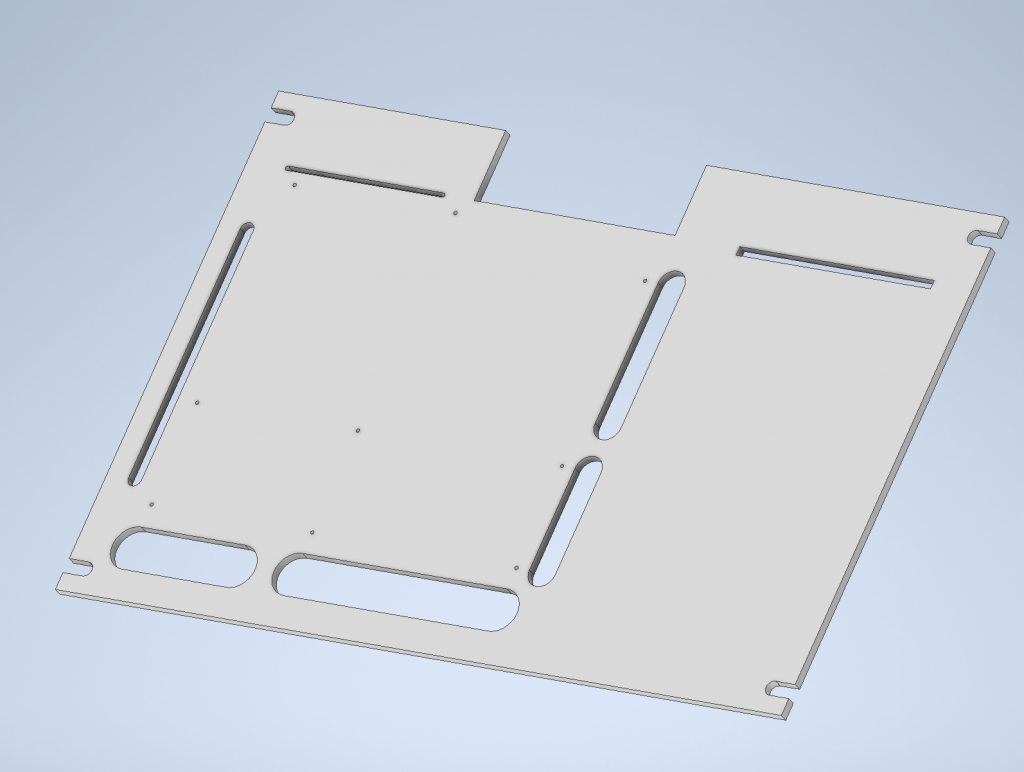
Ta da! the cutouts are gone! Well, in part. The truth is, these are actually two separate layers of the same shelf that’ll be cut out of 6mm plywood and sandwiched together like a delicious, radiata pine… well, sandwich… Except with PVA glue instead of butter, and screws instead of lettuce.
See, when you’re working with wood, and especially with a laser cutter, you need to work in 2D and quite literally build things up in 3D, as you’re dealing with one fixed constraint, being the Z height of the material you’re cutting. The latter picture is the upper layer, with the former being the lower layer. Both layers will fit snugly on top of each other with all the other holes (including that all-important one on the RHS) to create a perfectly cromulent and incredibly sturdy 12mm thick shelf, which is a mere 3mm shy of the factory IKEA shelf thickness, yet it’ll be almost twice as strong, seeing as it’ll be made from plywood as opposed to lightweight chipboard. Neato!
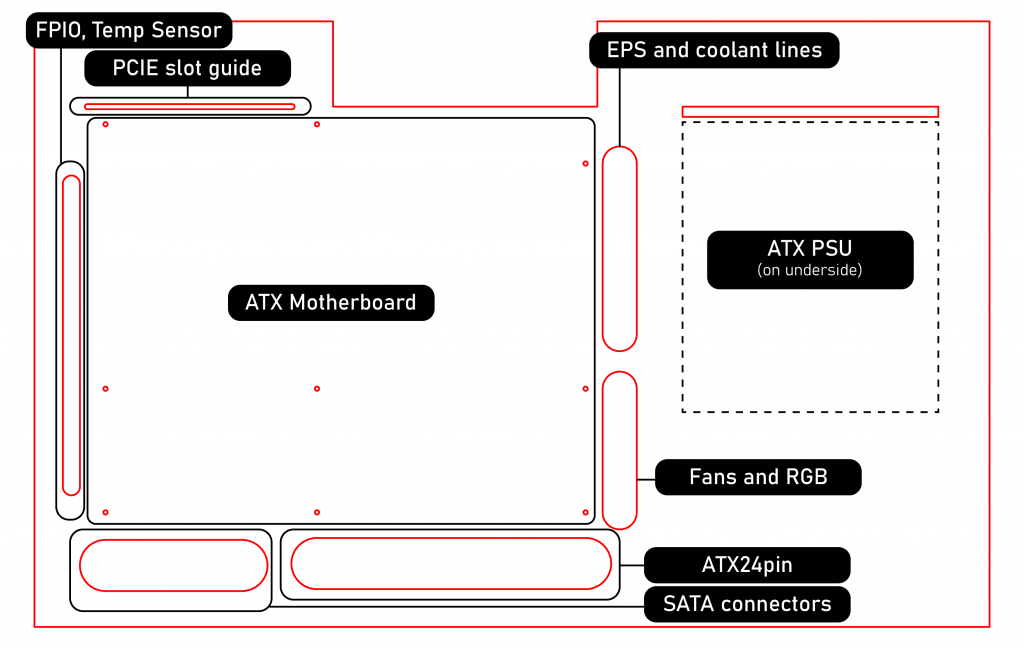
In effect, this serves as a tray to hold our Motherboard, PSU, and Pump/Reservoir combo in a neat location and in such a way that it will allow us to still have pretty good expandability in the form of having usable SATA and M.2 expansion, as well as access to all of our PCIE slots whilst still allowing us to use a heckin’ chonky copper water block on our GPU without risking GPU sag. As for the power supply? Well… I’d hate to leave you hanging here.
Yep, I’m suspending your disbelief by suspending the PSU in a bracket, once again made from 6mm Plywood, underneath the shelf using this mounting mechanism. Now, that’s not the only thing that’s doing the heavy lifting. That’s where this piece comes in.
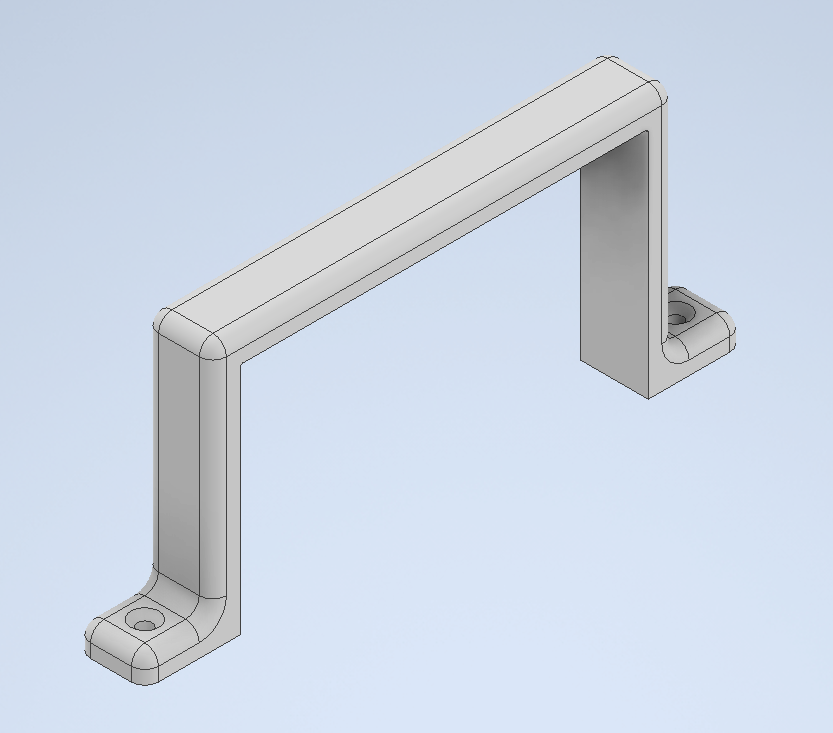
This is a simple 3D printed part that will bolt onto the underside of the PSU at the back edge to help it to hang in place. It’ll be printed from ABS and will be screwed to the underside using regular short wood screws. The tabs on the PSU mount will be glued into the shelf and then the excess sawn off with a fine bladed Japanese saw, or by just sanding it down with some coarse-grit sandpaper.
Speaking of screws and all things screwy, we need to now talk about the door, and more particularly how it’ll end up doing door things. You know, like for example, being a door.
So, my dearest mother is many things. She’s a qualified plumber, she’s a wicked good cook, and she knows a thing or two about woodworking. One thing that she introduced me to is the concept of threaded nut inserts, or nutserts for short. Nutserts are essentially bitey wood screws that screw into a piece of wood, making it capable of taking machine screws. These are ideal for say, having panels that are removeable in case you want to say, service or replace a radiator.
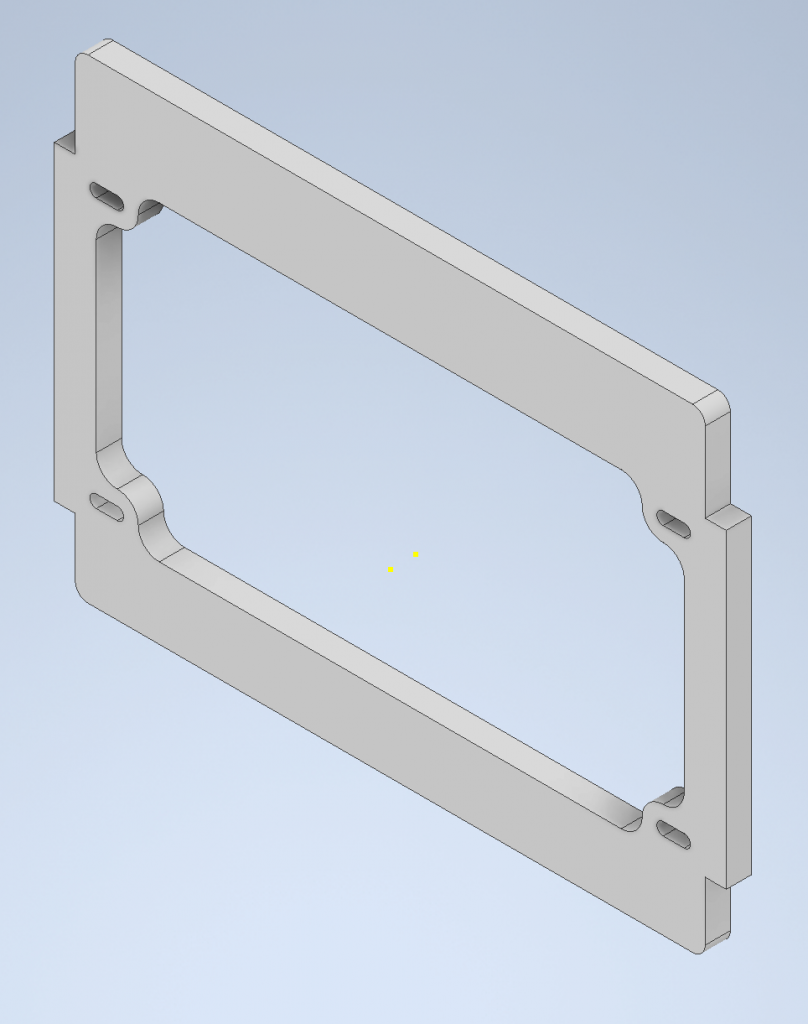
The 7mm holes int he corners of the radiator mount (and the other part needed to make the door) essentially allow for you to screw in M6 caphead machine screws into each corner to make removing the front panel grill a lot easier. Now that we’re also going 100% wood for this construction that means I can also show you this…
This is the midframe for the door. It doesn’t look like much, and that’s because well… it’s not. Literally just a box frame with 35mm cutouts for the Euro hinges that come standard on IKEA cabinets. The nutserts, the door screws and the hinge screws will do their bestest to keep this entire frame nice and strong. Also, doesn’t help that this’ll also be made from plywood.
Finally…
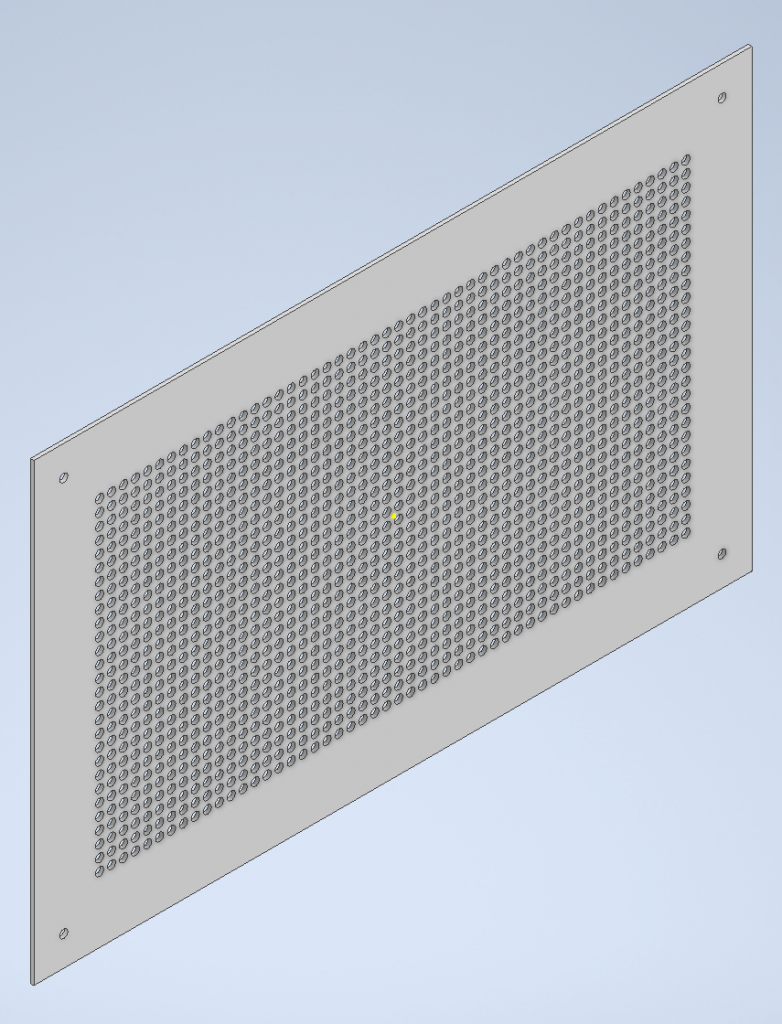
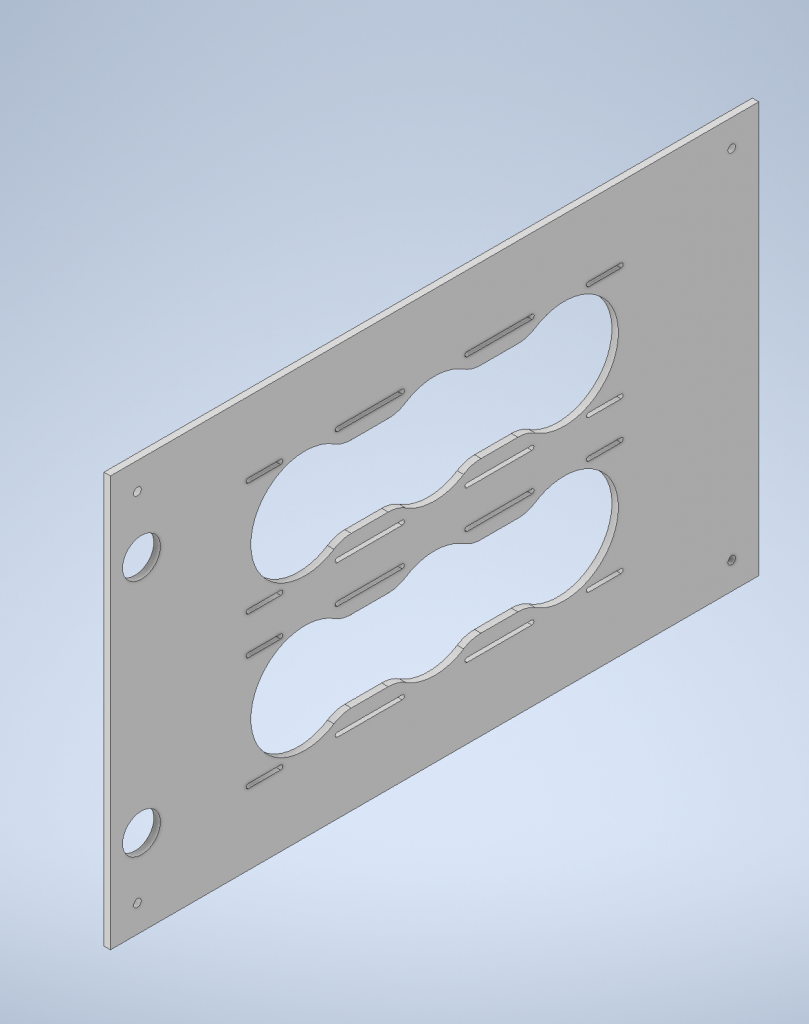
Don’t worry Robin, not much has changed about this panel, apart from the omission of my logo text and the slight relocation of the holes, moving them in so that the centres all sit exactly 12.5mm from the corners. Rest assured that this PC is going to breathe easy. Why? Well because there’s a ton of little holes in the darn door, of course.
On the next episode of Beano Builds an impossibly difficult PC, where we suss out the design and layout of our pesky PCIe slot retainers and go on an eBay hunt, to see if 6-32 threaded rod exists.
Until next time, Stay tuned to this Same Bat Time, Same Bat Channel!