Not to compare my project to make a smoke extractor for this laser to one of the greatest stories in Automotive history, but this project kinda had a bit of its own Lexus LFA moment over the past few days, and i think that It’s an important lesson to learn.
Sometimes your first design isn’t exactly going to be the most intuitive, and sometimes, even if your mind’s set on one thing, to make something that works better, you need to go back to the drawing board.
When scrapping and restarting a design from scratch works – the story of the Lexus LFA
When Lexus first designed the LFA, which is to those of us who aren’t car bores, Lexus’ take on hyper-GT car, their Chief engineer, Haruhiko Tanahashi, decided to make the entire body out of Aluminium at first, citing existing production capabilities within the Toyota group as the reasoning behind it. With the help of two of the higher ups at Toyota, including Akio himself, they pushed forward with this concept.
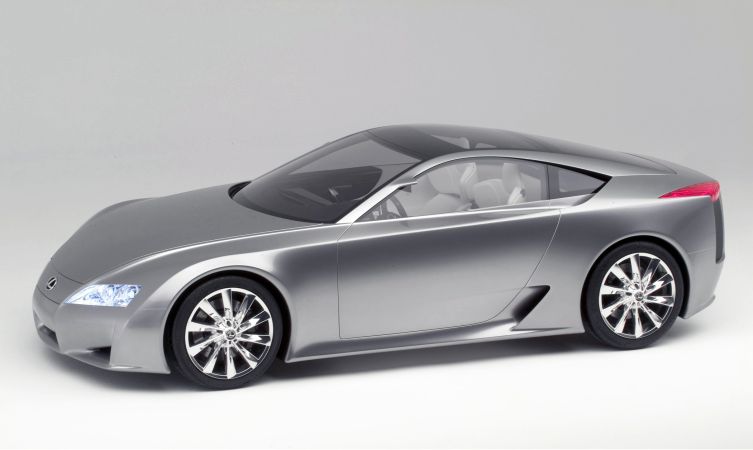
They had spent five solid years designing the car to be a front engined, rear wheel drive, V10 powered GT Car, showcasing the best craftsmanship skills of what the Toyota group was capable of.
By the release of the above pictured design study in 2005, the boffins (or Takumi as the Japanese call ’em) were already working on a Carbon Fiber prototype, based on an entirely clean-sheet design, bar the incredible 1LR-GUE engine.
Now, I’m going to quickly say, that even as a man who beats on about how EVs are the future and how they’re awesome and such, the 1LR-GUE is, in my opinion, nothing short of an engineering masterpiece. It’s an engine that has this incredible musical quality to it. It has a lot to do with the fact that the same guys who made the engine, also made the exhaust. Yamaha. A company that produces both incredible engines and musical instruments that grace orchestra pits the world over.
And if you don’t believe me? Go watch this video. This engine, and the one in the Porsche Carrera GT, are at least, in my eyes, the two best sounding engines ever made. If we do decide to keep making ICEVs, these are the ones i want to keep around.

What these engineers did by scrapping their old design, and starting anew, was the fastest production car on the planet around the nurburgring at the time. 7 minutes, 14 seconds, 64 milliseconds.
That record has since been smashed by the current record holder, the Mercedes-AMG One, a car that barely has a second seat, let alone a boot, and the current EV record holder, the Yangwang U9X, a 3,000 horsepower, 2-and-a-half ton monster of a supercar, both recording sub 7 minute times, but to consider that a car from 2012 could lap this 10+km hellscape of a track in less than 8 minutes is wild. Staggering, in fact.
The fact that this car could do that, and carry a couple of suitcases in the back whilst doing so? That’ s still impressive, and in fact, it took an EV, namely the Xiaomi SU7 Ultra, to beat its capabilities as a potential practical performance car for daily use… And that needed over three times the wheel horsepower of the LFA to do so.
What i’m saying with this lesson is that sometimes in order to make the best design for a product possible, you need to go back to the drawing board and completely rethink your design before applying it.
How I rethought the smoke extractor.
Now, you probably have seen my design for a similar system for the Snapmaker Artisan’s 200W CNC router. That utilised a replacement baseplate that adds screw and magnet fixtures to allow for a removable magnetic dust shoe, and a chamber that connects said dust shoe to a shop vac.
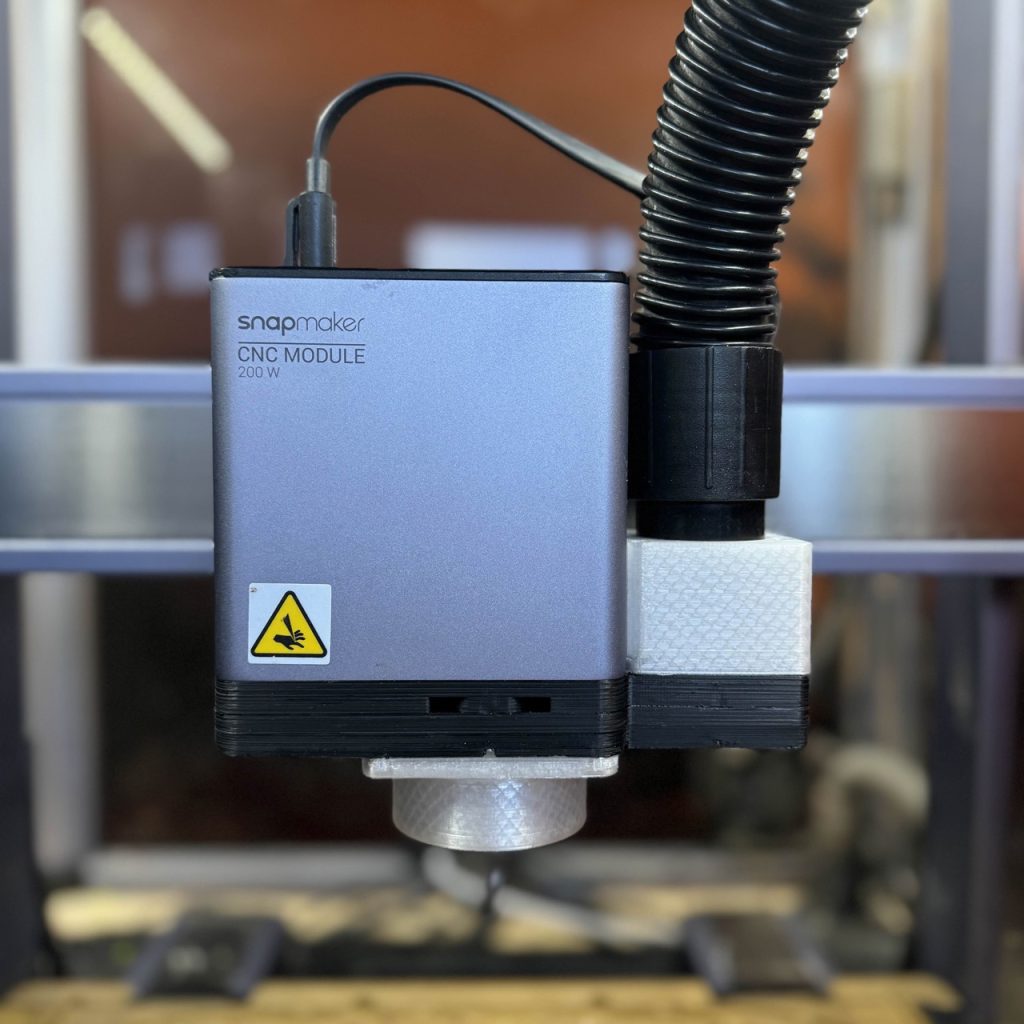
Now, i thought it’d be kinda unsafe initially to replace the lower section of the laser with a plastic that isn’t exactly the best at withstanding heat, namely PETG, but since the time I printed that CNC router shoe, my printing skills have gotten a lot better, and i’ve had a ton of success using Polymaker’s Fiberon PA612-CF15 Carbon fiber nylon filament, a material that has a heat deflection temperature of between 175 and 110°C depending on the circumstances, assuming annealing has been done to improve the material’s stiffness and heat deflection.
Even when unannealed though, this material is solid. It literally sounds like metal when you drop it, and it can print on unenclosed beds with temperatures as low as 40°C, provided you dry the filament in a drybox and use a nanopolymer bed adhesive like Vision Miner NanoPolymer or Menhir Xtreme Lock (especially on the smooth side of the Artisan’s PEI steel coated print bed)

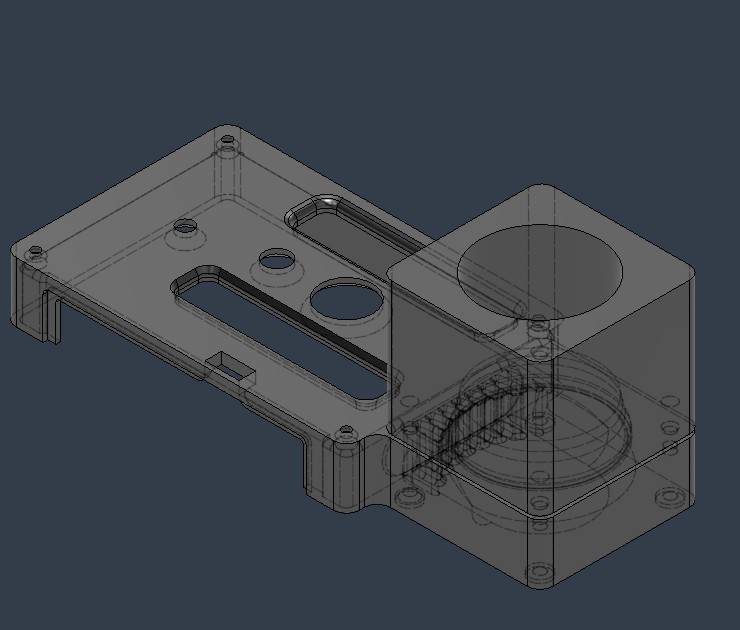
As shown above, the design i had originally intended to use was a three-piece design, requiring several heat-set inserts, and an overly complicated rear channel design which took in smoke from the cutout on the back of the existing shroud that was already on the laser. This unfortunately added two problems. Firstly, it required a staggering 8 inserts to make the design work, and secondly, it would add an additional millimetre, plus a potentially fragile supported bridge section to the design. It also required fairly complex modelling inside the part to ensure that the air channel allowed for clean airflow with no supports, as these supports would be impossible to remove.
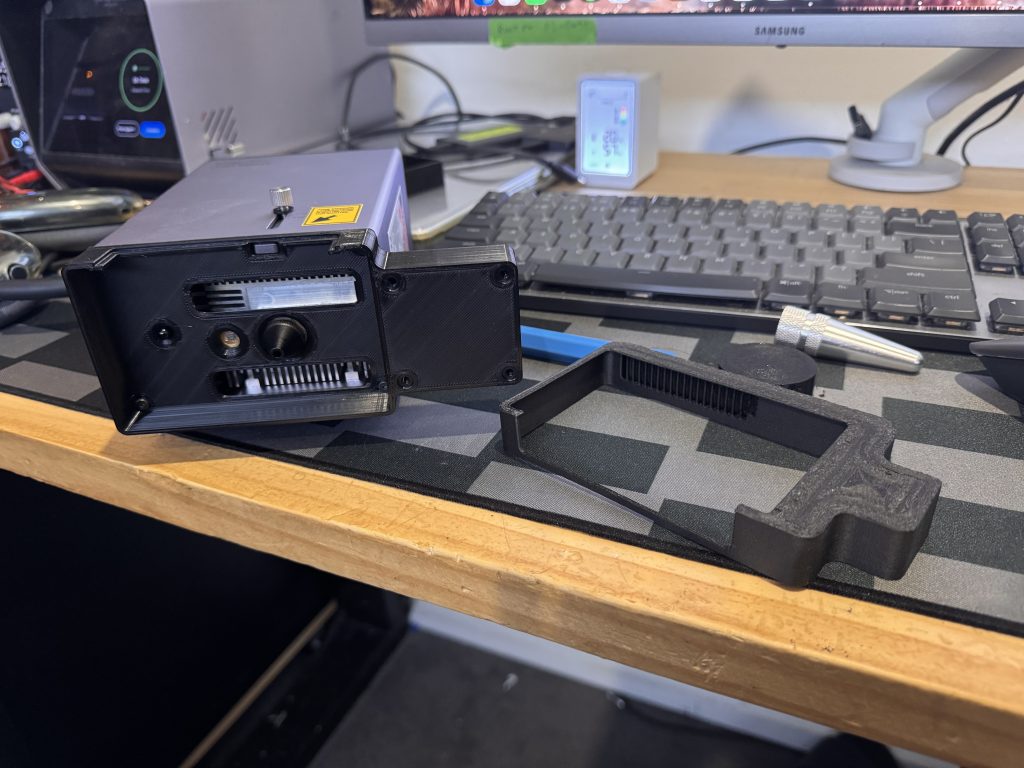
Enter the new design. It flows more air, it’s made of less parts, and it’s way more durable. It’s still a work in progress and I’ve still got to do testing on it.
This variant instead cuts component costs by doing several things.
Firstly, by replacing the lower shroud, the functionality of the laser’s height adjuster, fire detection system and laser crosshair is retained. Since we’re relying on a shop vac for airflow, air doesn’t have to be redirected out the back of the shroud, therefore ensuring greater smoke extraction.
Secondly, and speaking of airflow, airflow through the laser itself is improved, thanks to forced air being pulled through the assembly of the laser with the assistance of the top cooling fan. This should theoretically improve laser diode cooling, helping your laser to last longer. Since the air assist passes through a shroud which surrounds the laser aperture, this shouldn’t affect the airflow of the air assist.
Finally, this option allows for a direct connection to a shop vac by means of utilising a through-hole design for the vacuum inlet neck. It also means that only two parts, the lower shroud and the inlet neck need to be printed.
The only other components you need are four CNC Kitchen standard-length heat-set inserts, four 25mm M3 countersunk bolts (Ideally 316G stainless), and some 3M 486MP or 300LSE adhesive tape (to stick the old shroud’s watch-glass to the new part)
Toolwise, you just need a soldering iron with an M3 heat-set insert tip, a pair of 1.5 and 2mm Allen head screwdrivers, a small hobby knife or scalpel (to remove the old laser watch-glass), some alcohol (to clean the watch-glass of the old adhesive), a Christmas-tree style RC Body reamer and a 3D Print de-burring tool to clean up any rough edges of your prints.
Another lesson to learn: Kaizen and the art of lean manufacturing.
To learn another lesson from those two T-named Titans of the Technological world. Toyota and Tesla, The idea of lean manufacturing is something that one of my closest mates beats on pretty often about. To fully understand what the concept of “lean” is when it comes to making stuff, there’s 5 S’s (in Japanese) you need to do in order to lean out a project to Toyota’s standards.
- Seiri – to clear out. Clean the slate of any clutter, debris and overheads. This is where you need to trim your project scope down to its bare essentials. What does this thing actually need to do? In this case, it needs to suck out smoke, keep my eyes from getting shot out by a laser, and it needs to protect the laser from damage. The stock part did an okay job at all of these things, it just needs the smoke extraction, so we can copy the stock design as much as we need to, and then simply add the new feature in the new design.
- Seiton – to organise and distill . Organise the functions of your part in such a way that make the most logical sense. This is a rectangular shaped thing that needs to connect to a round shaped thing, so the most logical thing to do would be to stick a square with a circle in it off to the side, and then connect that pipe to the rectangular thing somehow, then connect the square to the rectangle by means of some sort of air channel.
- Seisou – to clean and check. When it comes to design, this means to trim away excess, scraps, material and part count, ensure wastage is reduced. Perform regular tests to make sure the part is functional, durable and most of all, non-wasteful. This also has a lot to do with maintaining a clean and organised work space. There should be a place for everything, and everything in its place. Don’t just put stuff down, put it away. That fancy pair of Moore and Wright or Sumitoyo verniers cost $300 a pair, treat them as such.
- Seiketsu – to create uniformity and conformity. Systematise your designs in such a way that makes them interoperable. If you already have a design for a connector for a shop vac to a thing that needs a shop vac connected to it, why redesign the wheel? Reuse what works and establish a system for it.
- Shitsuke – to establish customs and practices. Take these ideas into future projects, keep a well-organised library of previous designs and information and use those as your standards. Maintaining standards keeps part counts low, production costs low, and production profits high.
So in a sense, and to make this long story short, I’ve managed to update and improve the design of this part. Testing is next, where i’ll be going about ensuring the extractor performs its role well.
Stay tuned!
Beano out.